Drawing Tips
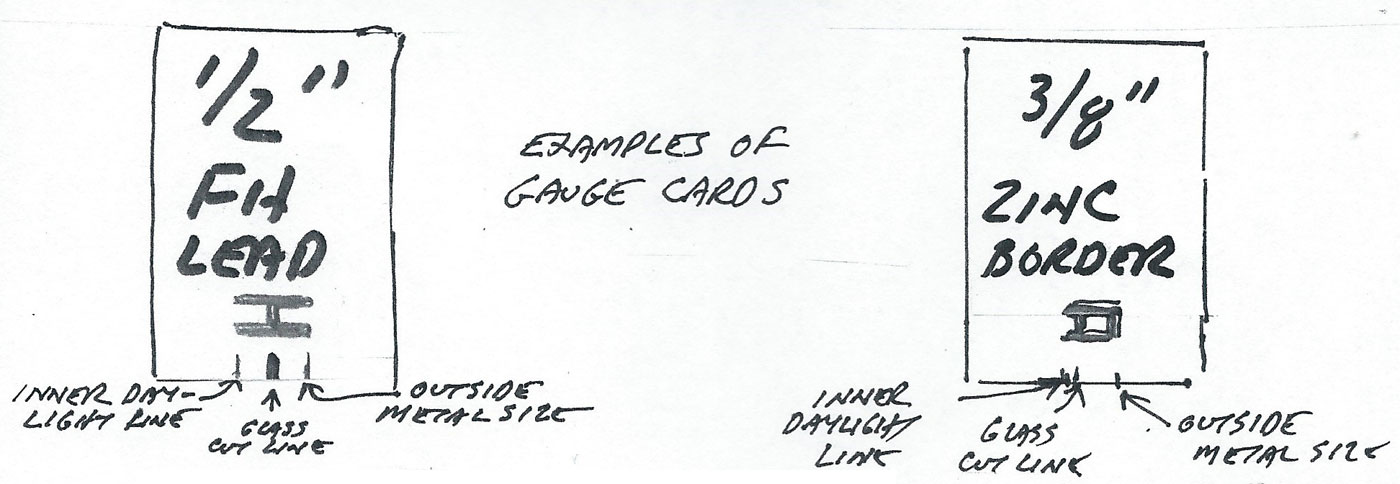
1: The gauge card
This is a small piece of thin cardboard marked with the outside metal line, the glass cut-line, and the inner daylight line. Make one for each of the different sizes and types of the edge metals you use in your shop. When working from a drawn perimeter line that represents the exact outside size of your panel, use the card to make tick-marks inside that line and then connect them with a straight edge. This method will Increase accuracy and save a lot of time laying out cut-lines. When framing an already-built panel, the card can be used in the reverse sense, to determine where the outer metal dimension will be.
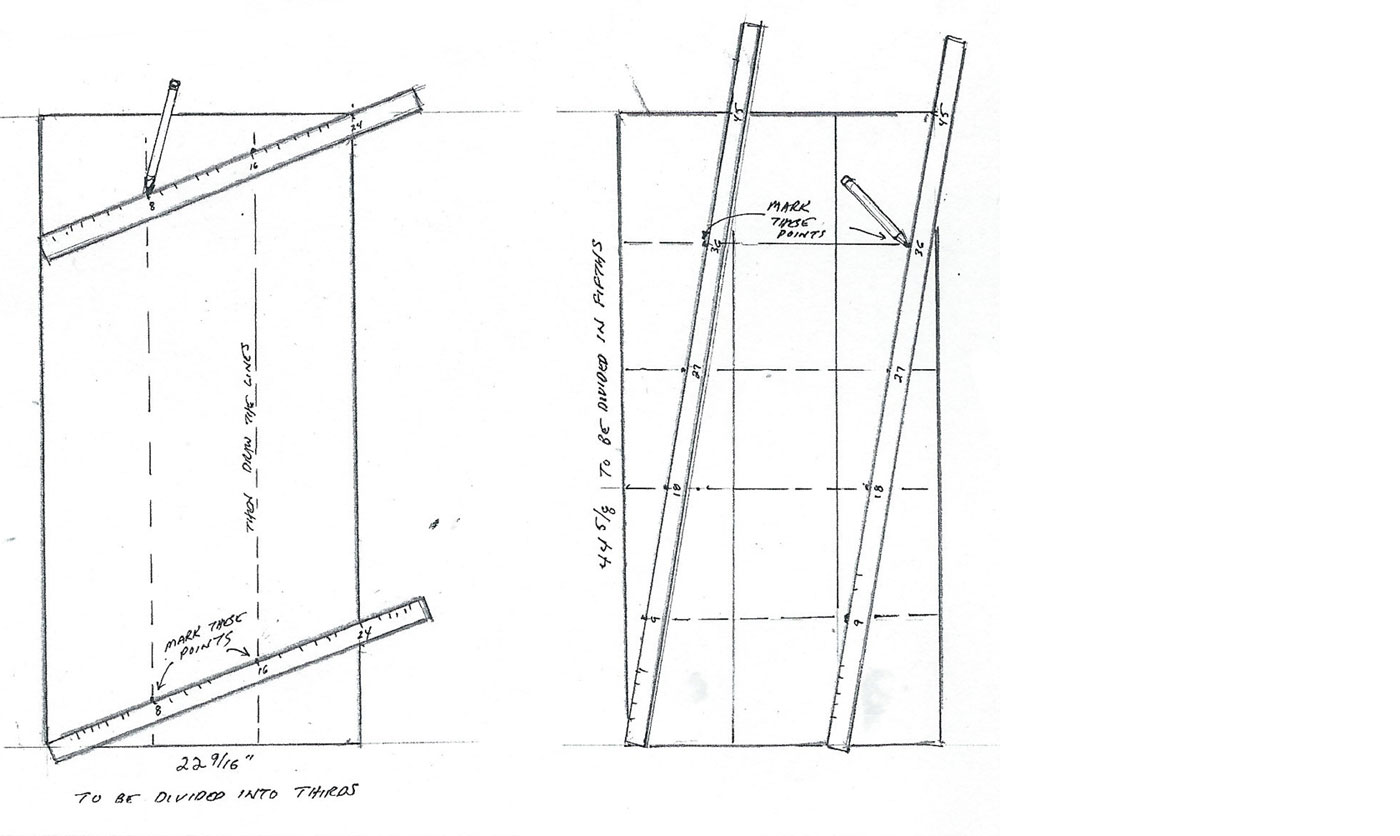
2: The Nomograph for rectangular panels
When dividing an inconvenient dimension, say 22-9/16″ wide by 44-5/8″ high into thirds (for example) by width, and fifths (for example) by height, a very accurate and fast method is to pick a whole-numbered inch dimension that is slightly larger than the desired dimension but more easily divided into the required fractions. In this case we choose 24 (divisible by three) and 45 (divisible by 5). After drawing the rectangle’s daylight line, lay the ruler in at whatever slight diagonal will place the zero mark and the whole-numbered dimension right on the daylight lines and make dots at the division points. 24″ divides nicely into three 8″ spaces, 45″ divides into five 9 inch spaces. Do this twice, as far apart on the rectangle as you can. Connect the dots and you’re in business.
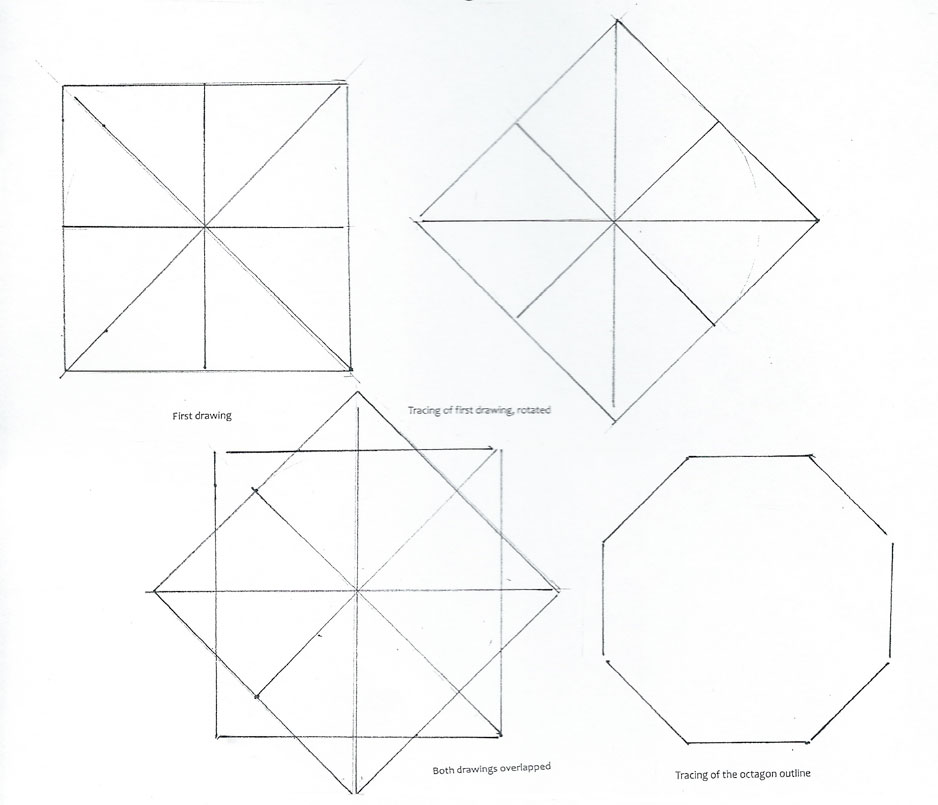
3: Drawing perfect octagons
This is a hard job to do accurately with compass and protractor. A more accurate and faster way is to draw a square with both sets of axes marked, vertical/horizontal and the diagonals. Trace the result on a second sheet of paper using the light table if you have one, or tracing paper if not. Overlay the second drawing on the first, with the top drawing turned 45 degrees to make the diagonals of the second drawing line up with the vertical/horizontal axis of the first. Copy the needed parts of the bottom drawing onto the top sheet, et, voila! Amazingly, this, trick works in well in both French and English.
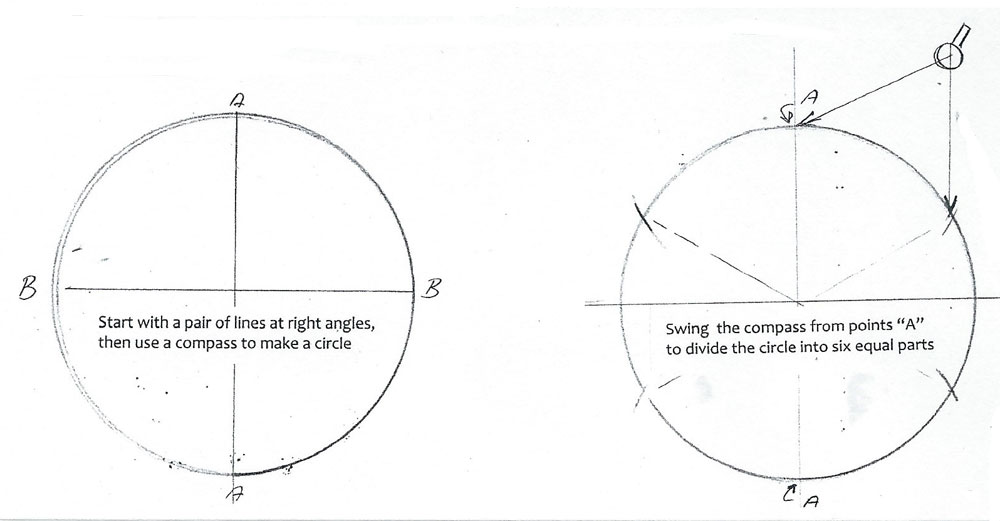
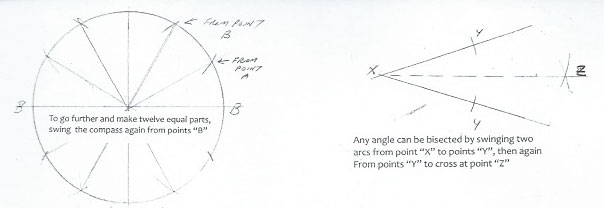
4: Circle tips for compass and straight-edge
Most school children learn how to draw a compass flower, which easily divides a circle into six. Getting twelve points from there can be done by the two-drawing-overlay method described above under “octagons” or by using the compass to bisect the 6o degree angle. Any angle can be bisected this way, But no angle can be trisected with only a compass. Ancient.Greek geometers searched for decades for a method to do this before deciding that it was impossible.
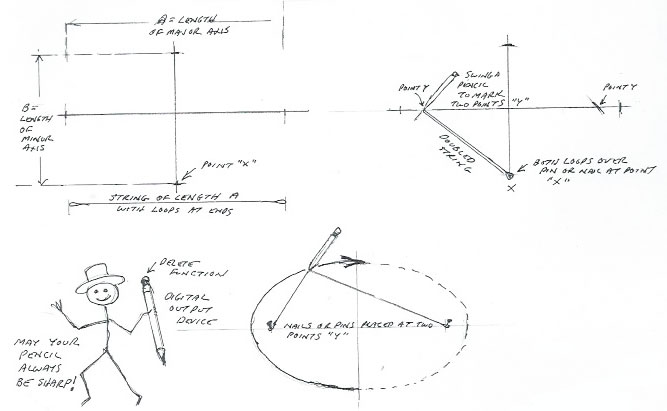
5: Ellipse drawing with string and tacks
Legend has it that Thomas Jefferson used this method to lay out gardens at Monticello. He might have used two human helpers and a survey chain, but it works just as well with two thumbtacks and a string. For an ellipse of A by B dimensions start with a pair of lines drawn at right angles, where A is the major axis and B the minor. Make a string of flexible but not too stretchy material with loops at each end just equal to length A. Double the string to half its length, then with both loops around a tack placed temporarily at point “X”, swing a pencil in the string to make two marks on the major axis at two points “Y”. Relocate the tacks to those points, put the two loops over them and then pull the pencil point guided by the string around to make a nearly perfect ellipse.
6: Drawing long curved lines with a Batten
A long clean curved line with no bumps or hitches is something that boat-builders call “eye-sweet”. Borrowing boat drafting technique, you can use a long thin stainless steel ruler on its edge, bent on your drawing and held there by one person while another person draws the line. This works well on small drawings. For big wall-size drawings, if you have access to a table saw and some clean straight-grained lumber, you can make a long and thin (try 3/4″ by 1/4″ for a starting suggestion) drawing batten. Use nails at strategic laces to adjust the batten until it is exactly where you want it to be.
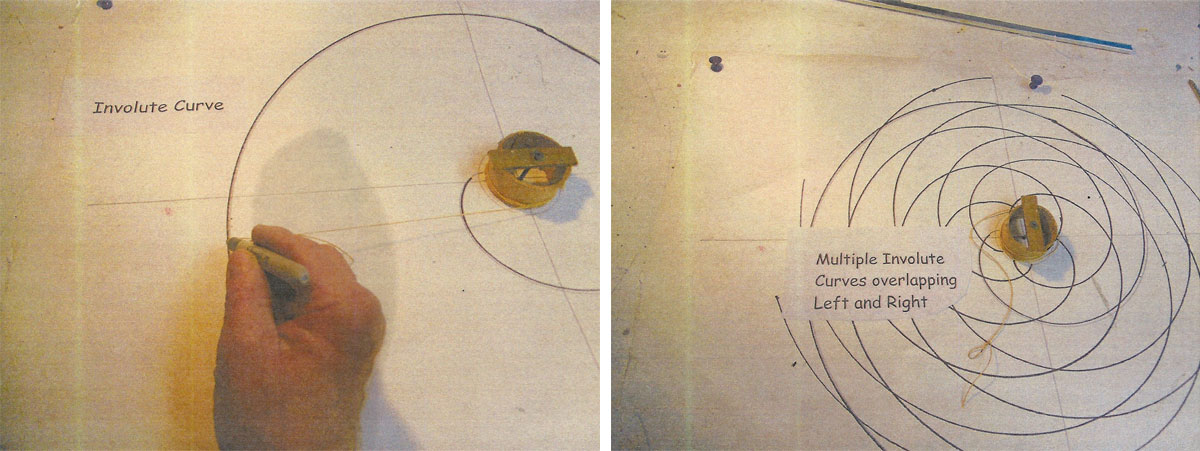
7: The Involute
This is a delightful way to draw a spiral that was used by stone masons in medieval times. It comes from a string unwinding around an object with a pencil in a loop at the end of the string. I won’t say too much about this, other than to suggest experimenting and having fun. The object in the center need not be round, many types of curves can unwind from triangles, squares and other polygons.