Wooden Sashes
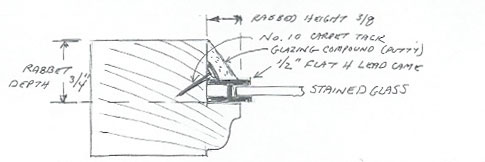
1: Conventional Sash:
These are almost always made from resinous soft Wood like pine, which resists rot better than hardwood. Most sashes are made with a 3/8″ high by 3 /4″ deep rabbet so that the stained glass Panel edged in 1/2″ flat “H” lead came will show a 1 /8″ reveal from inside.
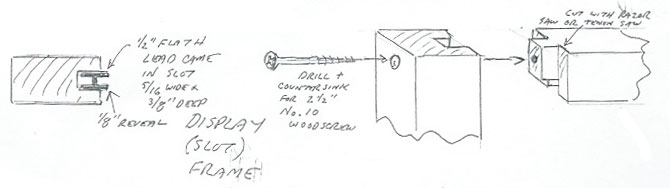
2: Display Frames:
When making a display frame, avoid making mitered Corner joints, leave that for the picture framers. Mitred corners always open up with time to show a daylight gap. Make butt joints like a sash. Always think about reparability; it must be possible to take the panel out of the frame easily. Use screws instead of nails, if making a slot-frame; or make the frame like a sash with a rabbet, but with the glass panel installed with wood moldings instead of putty.
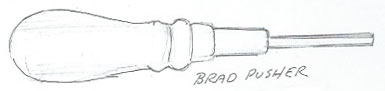
3: Brad pushing tool:
It is safer not to hammer nails, even small ones, next to glass. Unless you have an air compressor and air driven brad nailer, A magnetic brad-pushing tool such as the Great Neck brand BD-1 or the Crown 110XD make the job much easier and neater. Either tool can be found for about S2o.00.
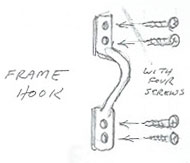
4: Frame hooks:
These look better than screw eyes for hanging a wood-framed panel and are much safer because they install from the side, a better way to install screws to fight gravity.
A method for making Circular wooden Sashes and Frames
Note: this requires a higher level of woodworking skill, and possession of a wood router and either a wood cutting bandsaw or a jigsaw
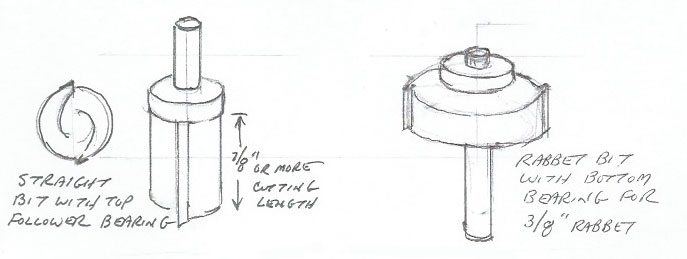
You will need the following bits for the wood router:
1: Make a trammel or beam for your router. This can be either wood or metal, drilled out for the same hole pattern as the base-plate of your router, which it will replace while cutting the pattern ring.
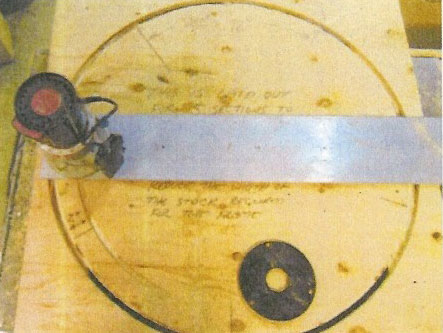
2: With a straight bit mounted to the router, cut the pattern ring out of Masonite, MDO or MDF board. You will not need to have a plunge router, an ordinary one will do. Just go slowly and increase the depth of cut until breakthrough. Cut the outside of the ring first and then the inner.
3: Use the ring to mark out the rough cuts on the framing lumber. The wider the board, the fewer segments needed. we like to make rings with just four parts, which makes the glue-up simpler. Cut each segment slightly outside the marked lines, and slightly longer in overall length.than needed. Make two the complete sets, one for each layer.
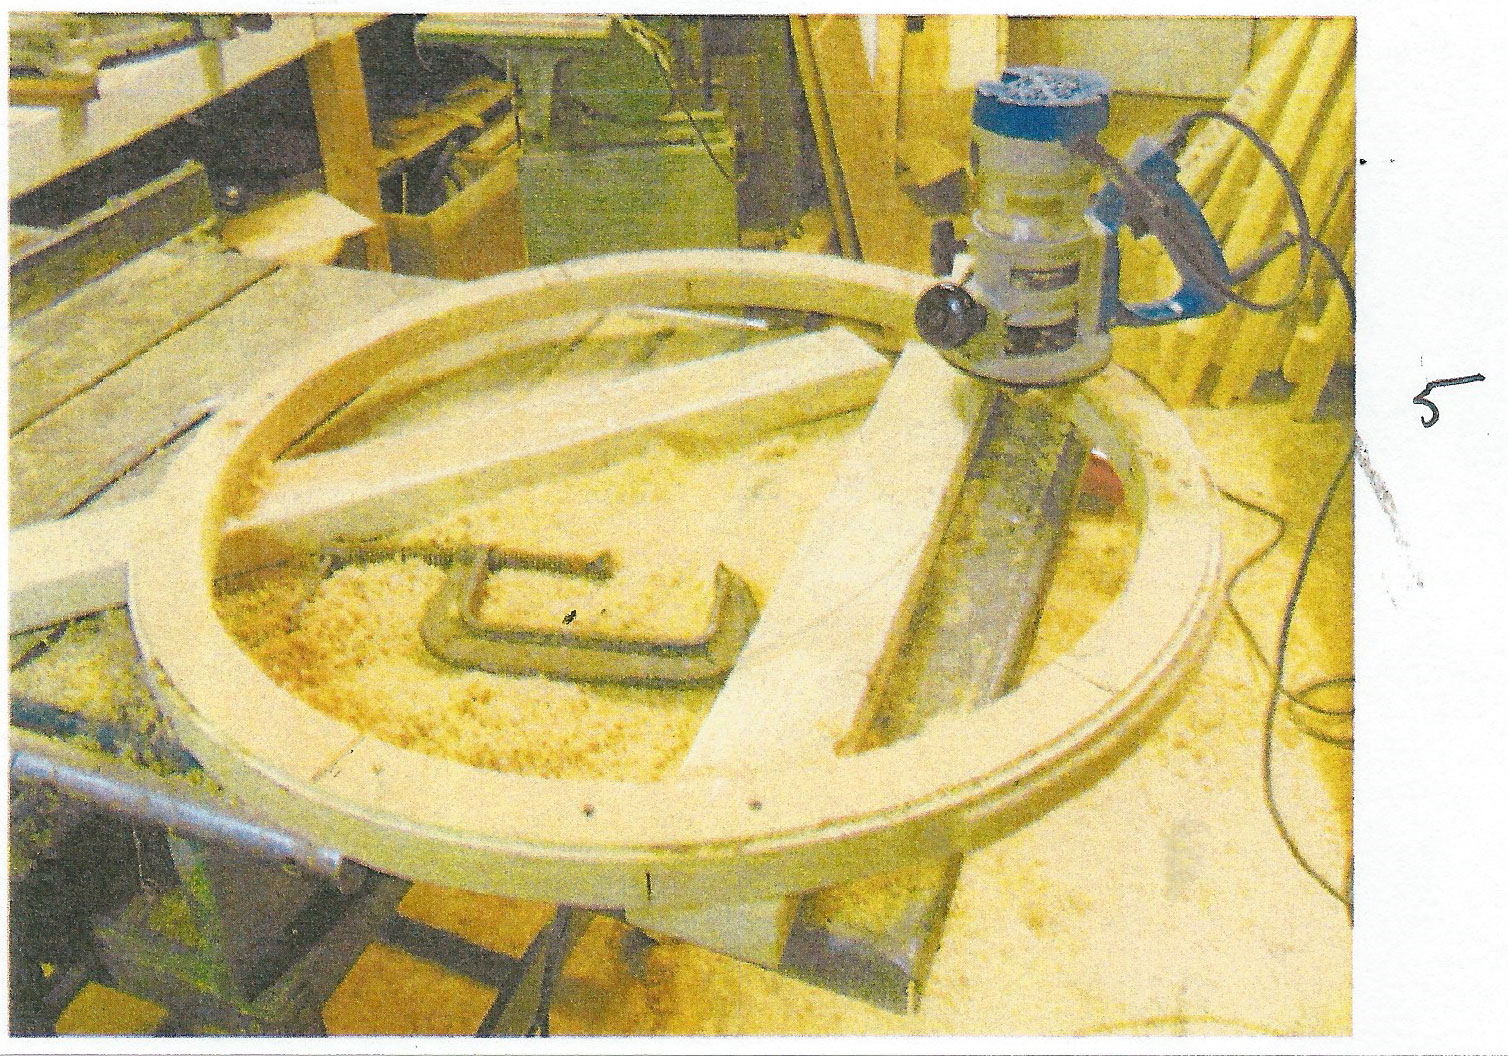
4: Use the ring and some clamps to align the rough-cut pieces and cut the ends of each segment to mate with the next one. Use small counter-sunk wood screws through the pattern ring into the stock to hold the stock for milling with the router. The screw holes can be turned inward when the two rings are glued together. Do this for two complete rings.
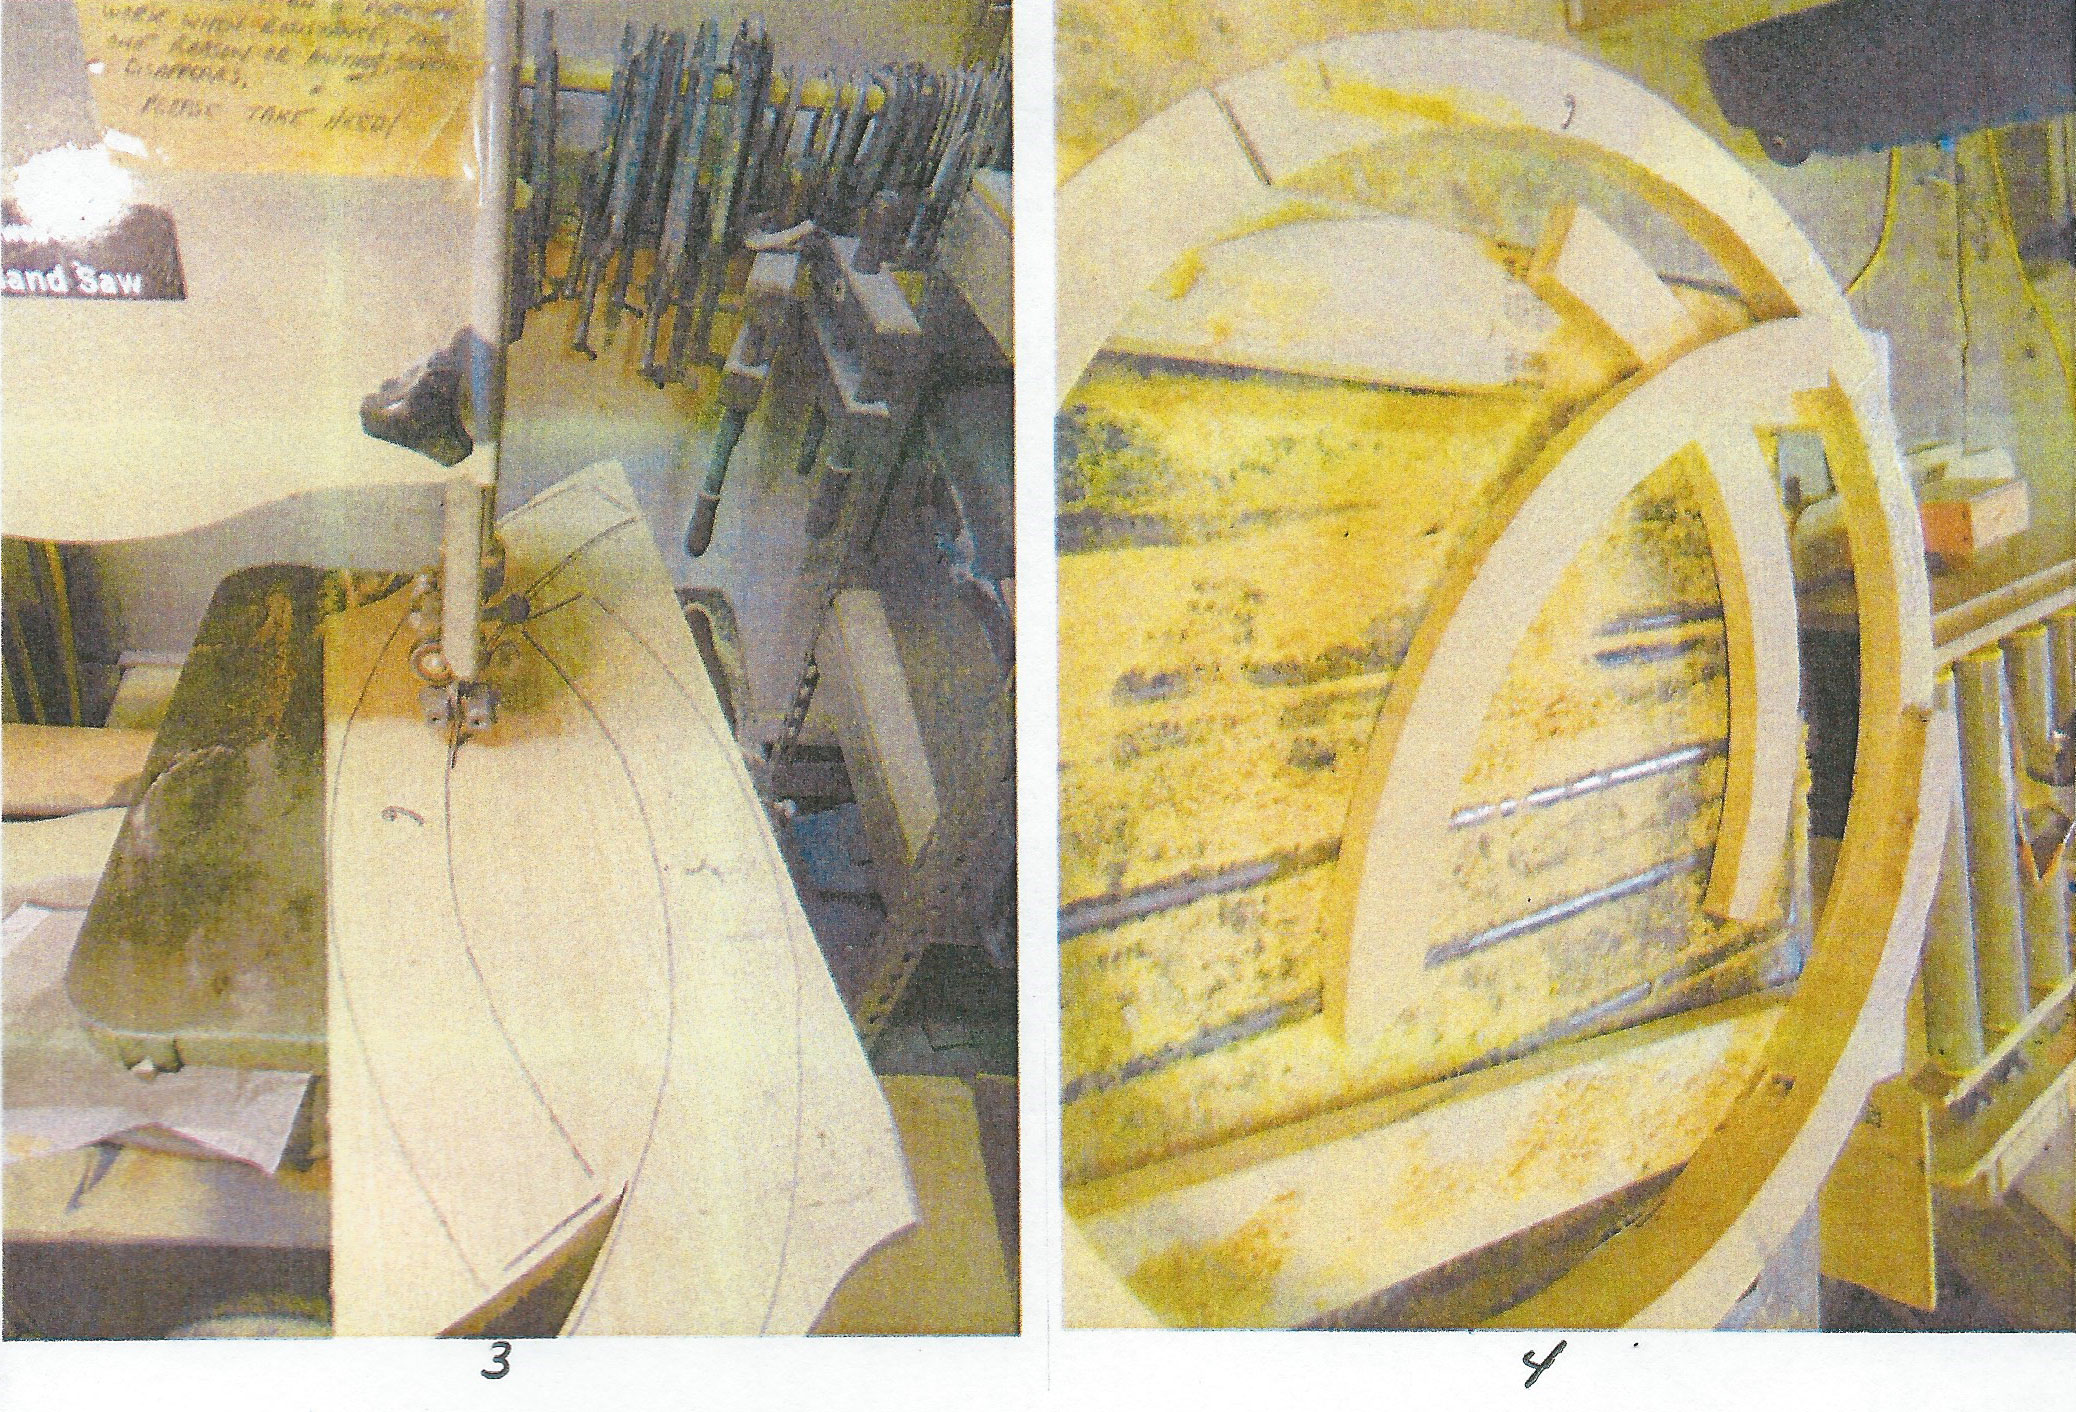
5: With pattern ring on top of the stock, use the straight router bit with the top follower-bearing to make the finish cuts on the segments, Tear-out will be minimal with the ends of the segments tightly butted together, but still go very slowly at the joints because if there is going to be tear-out, it is most likely to happen here. This method eliminates 90 percent of any sanding that will be needed later.
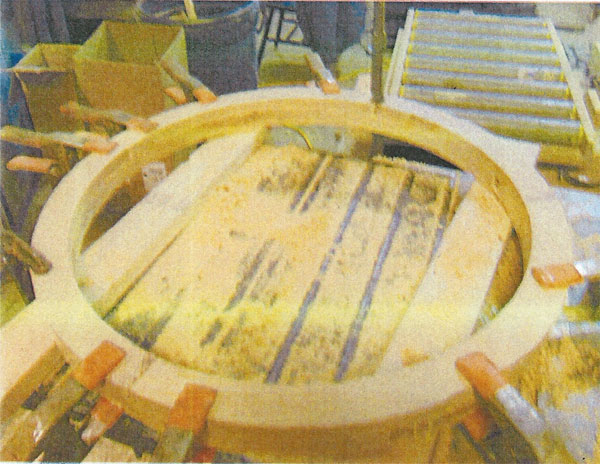
6: Glue up the two layers of segments on top of the pattern the ring, with the joints staggered for strength. Remember to turn any screw holes left from step 4 inward, into the glue joint. We like to protect the pattern ring from glue spills with a layer of plastic sheet between it and the glued-up stock.
7: After the glue is dry and any dried glue is cleaned up, use the roller-nose rabbetting bit to cut the 3/8″ high, 3 /4″ deep rabbet. Do this slowly in a number of passes, increasing the depth a bit at a time. You may want to use a roller-nose profile bit on the inner edge of the other side of the ring. After finishing the ring, a glass-retaining molding may be made in one of the conventional ways, either with many small saw kerfs or by steam bending. Or make a sort of a molding with flexible chair-caning, a rope, or even a metal ring made of zinc or lead came.